




How to Test a Diabetic Cat’s Blood Glucose at Home
By Dr Duncan Houston
Checking your cat’s blood glucose at home can feel more intimidating than giving the insulin injection itself. You need a tiny drop of blood, your cat has suddenly decided their ears are private property, and the meter seems to start its countdown precisely when the blood disappears into the fur.
The technique usually becomes much easier with practice. The most important steps are warming the sampling site, using an appropriate lancet depth, supporting the ear or paw from behind and having every piece of equipment ready before you begin.
The bigger clinical risk is not the lancet. It is changing insulin because of one unexpected number without considering your cat’s appetite, behaviour, body weight, glucose trend and the reliability of the reading.
Quick Answer
Use a veterinary-calibrated blood glucose meter and collect a small capillary blood sample from the outer ear margin or a suitable non-weight-bearing paw pad. Warm the site, obtain a clean blood droplet, apply it to the test strip and record the result alongside meals, insulin and clinical signs.
Do not alter your cat’s insulin dose based on one reading unless your veterinarian has given you a specific written protocol. A glucose result below 60 mg/dL, or 3.3 mmol/L, is concerning, while weakness, wobbliness, tremors, unusual behaviour, collapse or seizures should be treated as an emergency.
Why Is Home Blood Glucose Testing Useful?
Cats can experience substantial stress hyperglycaemia during transport, restraint and hospitalisation. Their blood glucose may rise because they are frightened rather than because their diabetic control is genuinely poor.
Current feline diabetes guidance no longer recommends routine in-hospital blood glucose curves. Home monitoring generally provides information under more normal conditions, although some cats can still become stressed when restrained for testing at home.
Home monitoring may help your veterinary team:
-
Detect hypoglycaemia before severe signs develop
-
Assess how low glucose falls after insulin
-
Estimate how long the insulin is working
-
Investigate recurring thirst, urination or weight loss
-
Assess a possible missed injection or fur shot
-
Monitor a cat that may be approaching diabetic remission
-
Distinguish an inadequate dose from an excessive dose followed by rebound hyperglycaemia
The results must still be interpreted alongside appetite, water intake, urine production, body weight, muscle condition and general behaviour. Current guidance emphasises monitoring the cat, not just the numbers.
What Can a Home Glucose Test Tell You?
A portable glucose meter measures your cat’s blood glucose at that particular moment.
A single reading can help answer questions such as:
-
Is my cat currently hypoglycaemic?
-
Is glucose unexpectedly low before the next insulin injection?
-
Is glucose still very high despite treatment?
-
Is a continuous glucose monitor reporting a believable low result?
-
What is happening at this point during a planned glucose curve?
One reading cannot reliably tell you:
-
Whether the insulin dose should be increased
-
Whether the insulin lasts for the full dosing interval
-
Whether an earlier episode of hypoglycaemia occurred
-
Whether your cat has diabetic ketoacidosis
-
Whether a high result is caused by stress, inadequate insulin or rebound hyperglycaemia
-
Whether the diabetes is well controlled over several days
That is why glucose trends and the cat’s clinical response matter more than one isolated result.
What Equipment Do You Need?
Prepare everything before bringing your cat into position.
You will usually need:
-
A veterinary-calibrated portable blood glucose meter
-
Compatible test strips
-
A fresh lancet
-
A lancing device with adjustable depth
-
Cotton wool, gauze or a folded tissue
-
A warm cloth or another safe warming aid
-
A small light if the ear vessels are difficult to see
-
A treatment log or phone app
-
A sharps container
-
A small reward, ideally part of the cat’s normal meal or usual low-carbohydrate food
Your veterinary team should demonstrate the meter and sampling technique before you begin home testing. Ask them to watch you perform a practice test so they can correct your hand position, lancet depth and sample application.
Should You Use a Human or Veterinary Glucose Meter?
Current AAHA guidance recommends using a meter calibrated specifically for veterinary patients.
Human glucose meters are calibrated for the distribution of glucose within human blood. Cats have different red blood cell characteristics, so a human meter may produce results that differ systematically from a veterinary-calibrated device.
This does not mean every result from a human meter is useless. It means that:
-
Human and veterinary readings should not be assumed to be interchangeable
-
Target ranges may differ according to the device
-
Switching meters can create an apparent change that is caused by the equipment rather than the cat
-
Low or unexpected results may need confirmation
Use the meter recommended by your veterinarian and apply the interpretation thresholds intended for that device.
Where Can You Collect Blood From a Cat?
The most commonly recommended home sampling sites are:
-
The lateral or outer ear margin
-
A non-weight-bearing paw pad
-
An accessory pad, such as the carpal pad
Current feline guidance recognises the lateral ear and suitable non-weight-bearing or accessory pads as practical capillary sampling sites. A study comparing ear and paw sampling also found that metacarpal and metatarsal pads could provide glucose results comparable with ear samples and were generally well tolerated.
The outer ear margin
The outer edge of the ear is usually the most practical site for repeated home testing.
Aim for the narrow area between the visible marginal blood vessel and the outer edge of the ear. You do not need to puncture the large vessel directly. Capillaries within the surrounding tissue can provide enough blood for the meter.
Advantages include:
-
Easy access in many cats
-
A relatively clean sampling surface
-
Good visibility when light is placed behind the ear
-
Ability to alternate between both ears
-
Less contact with floors and litter
Potential problems include:
-
Cold ears that do not bleed easily
-
Bruising after repeated sampling
-
Long hair obscuring the blood droplet
-
Cats that dislike their ears being handled
A non-weight-bearing or accessory paw pad
A suitable paw pad may be useful when:
-
The ears are sore
-
Ear sampling repeatedly fails
-
The cat strongly resists ear handling
-
The owner finds the pad easier to stabilise
Avoid inflamed, cracked, dirty or injured skin. A central pad that repeatedly contacts the floor and litter tray is usually less convenient than a cleaner accessory or non-weight-bearing site.
Ask your veterinary team to identify the safest pad on your individual cat before using this technique.
Ear Sampling Versus Paw Pad Sampling
| Sampling site | Main advantages | Main limitations |
|---|---|---|
| Outer ear margin | Easy to see, relatively clean, suitable for repeated testing and simple to alternate | May need warming, can bruise and some cats dislike ear handling |
| Accessory or non-weight-bearing pad | Useful when ears are sore or sampling is unsuccessful | Pad may be thicker, harder to stabilise or more exposed to contamination |
| Central weight-bearing pad | Can produce blood | Generally less desirable for repeated home use because it contacts floors and litter |
There is no rule that every diabetic cat must be tested from the ear. The best site is the one that provides a reliable sample with the least stress and tissue irritation.
How to Test Your Cat’s Blood Glucose Step by Step
Step 1: Choose a calm location
Use a quiet, well-lit location where your cat already feels comfortable.
Some cats cooperate best:
-
On their favourite bed
-
On a stable bench with a non-slip mat
-
On the owner’s lap
-
While eating
-
With gentle towel support
-
With one person holding and another testing
Avoid chasing your cat around the home with a lancet. That is an excellent way to make both the cat and the glucose result more stressed than necessary.
Step 2: Prepare the meter first
Before restraining your cat:
-
Wash and dry your hands.
-
Confirm that the test strips are compatible with the meter.
-
Check that the strips are not expired or damaged.
-
Prepare the lancet device.
-
Have gauze or cotton ready.
-
Open your treatment log.
-
Turn on the meter or insert the test strip according to its instructions.
Some meters begin a limited countdown after the strip is inserted. Learn your device’s sequence so you do not have to wrestle with packaging while holding your cat’s ear.
Step 3: Warm the sampling site
Warmth improves capillary blood flow and is one of the most effective ways to obtain a usable droplet.
You can use:
-
A comfortably warm cloth
-
A purpose-made warming pad
-
Gentle massage with your fingers
-
A warm rice sock that has been carefully temperature tested
The warming aid should feel comfortably warm against your inner wrist. It should never be hot enough to burn the thin skin of the ear.
Hold it against the site for approximately 20 to 30 seconds, or until the tissue feels warm.
Step 4: Support the ear or paw
Place folded gauze, cotton wool or a firm but soft backing behind the sampling site.
This:
-
Gives the lancet something to press against
-
Prevents the ear from moving away
-
Reduces the chance of puncturing your own finger
-
Helps create a cleaner puncture
Keep your own fingers away from the path of the lancet.
Step 5: Use an appropriate lancet depth
Adjustable human lancing devices commonly offer several needle depths. Current guidance suggests that many cats require a depth of approximately 1.0 to 1.8 mm for ear or paw sampling, although skin thickness and device design vary.
A depth that is too shallow may produce no blood. A setting that is unnecessarily deep may increase discomfort or bruising.
Your veterinary team can help you select the starting depth for your device.
Step 6: Make one clean puncture
Hold the device firmly against the sampling site and activate it once.
If you are using the ear, puncture the outer marginal area rather than the centre of the ear.
A sterile hypodermic needle can also collect a sample, but many owners find a spring-loaded lancet device easier and more consistent.
Step 7: Allow a blood droplet to form
Wait briefly for a rounded droplet to appear.
Gentle pressure from below may help, but avoid repeatedly squeezing, crushing or aggressively milking the tissue. Excessive manipulation can dilute or contaminate the sample and makes the experience more unpleasant for the cat.
If the blood immediately spreads into the fur, parting or carefully clipping a tiny area may make future sampling easier. Do not shave an ear without guidance if the cat is likely to move suddenly.
Step 8: Apply blood according to the meter instructions
Most modern strips draw blood into an opening along the edge of the strip.
Bring the strip to the blood droplet and allow it to absorb the sample. Do not wipe blood across the top of the strip unless the manufacturer specifically instructs you to do so.
Wait for confirmation that the meter has received enough blood.
An error message usually means:
-
The sample was too small
-
The strip was moved too soon
-
Blood was applied incorrectly
-
The strip was damaged or expired
-
The device timed out
Use a new strip for the next attempt.
Step 9: Apply pressure to the site
Once the sample has been collected, apply gentle pressure with clean gauze or cotton for approximately 15 to 30 seconds.
Hold it longer if:
-
The large marginal vessel was accidentally punctured
-
The cat has a clotting disorder
-
The site continues bleeding
-
Bruising has occurred previously
Check that bleeding has stopped before releasing your cat.
Step 10: Record the complete event
Record more than the glucose number.
A useful entry includes:
-
Date
-
Time
-
Glucose result
-
Whether the unit is mg/dL or mmol/L
-
Time and amount of food
-
Time and dose of insulin
-
Medication changes
-
Activity
-
Vomiting or diarrhoea
-
Water intake
-
Urination changes
-
Any suspected missed dose or fur shot
-
Behaviour or signs of hypoglycaemia
Continuous glucose monitors also allow notes about meals, insulin, exercise and unexpected events. These details can substantially improve interpretation.
Step 11: Reward your cat
Offer a calm reward immediately after testing.
This may be:
-
Part of the normal meal
-
A small appropriate food reward
-
Brushing
-
Play
-
Affection
-
Release from restraint, which many cats consider the finest prize available
Consistency helps your cat learn that testing predicts something pleasant and ends quickly.
What If You Cannot Get Enough Blood?
Failed samples are extremely common while owners are learning.
The most likely explanations are:
-
The ear or pad is too cold
-
The lancet depth is too shallow
-
The lancet is blunt or has been reused
-
The device is not held firmly against the skin
-
There is no support behind the ear
-
The blood is disappearing into long fur
-
The puncture is too far from the capillary-rich margin
-
The cat moved during activation
-
The test strip was inserted too early and timed out
Try the following:
-
Warm the site for longer.
-
Use a fresh lancet.
-
Confirm the device depth.
-
Place firmer backing behind the ear.
-
Position a light behind the ear to identify the marginal vessel.
-
Change to the opposite ear.
-
Ask your veterinarian whether another lancet gauge or sampling site would be more suitable.
After several unsuccessful attempts, stop and allow your cat to settle. Repeated punctures during one increasingly dramatic session can make future testing much harder.
Not every cat or owner is suited to repeated capillary testing. Continuous glucose monitoring may be a better option when home sampling causes significant distress.
How Often Should You Check Your Cat’s Blood Glucose?
There is no single testing schedule that is correct for every diabetic cat.
Glucose monitoring is commonly recommended:
-
Five to fourteen days after starting insulin
-
After an insulin dose change
-
Whenever diabetic signs return
-
When hypoglycaemia is suspected
-
When the cat’s appetite or body weight changes
-
When diabetic remission may be developing
-
When another illness or medication may have altered insulin requirements
Current guidance recommends the first glycaemic assessment around five to seven days after starting glargine U-100 or protamine zinc insulin. Rechecks may then continue every five to seven days while the dose is being established, or every ten to fourteen days when less complete home information is available.
There is no universal seven-day rule
The advice to avoid all glucose testing for seven days after an insulin adjustment is too rigid.
A planned assessment is often performed after several days because the veterinary team needs enough information to evaluate the treatment response. However, you should not wait when:
-
Your cat appears hypoglycaemic
-
Your cat is vomiting or not eating
-
An accidental overdose may have occurred
-
Your cat suddenly becomes weak or disoriented
-
A continuous monitor reports repeated low readings
-
Your veterinarian has prescribed an earlier monitoring protocol
Some basal insulin protocols require continuous monitoring from the beginning and may be adjusted more rapidly under close veterinary supervision.
Spot Check, Glucose Curve or Continuous Monitor?
| Monitoring method | What it shows | When it is useful | Main limitation |
|---|---|---|---|
| Spot glucose check | Glucose at one moment | Suspected hypoglycaemia, a personalised pre-insulin check or confirmation of a CGM result | Cannot show insulin duration or an earlier low episode |
| Home glucose curve | Serial readings over one dosing interval | Assessing nadir, duration and overall response to insulin | Day-to-day variation and sampling stress can affect results |
| Continuous glucose monitor | Interstitial glucose trends throughout the day and night | Initial regulation, suspected hidden hypoglycaemia, remission assessment and difficult cases | Not calibrated specifically for cats, may detach and low results may need confirmation |
| Fructosamine | Average glycaemic exposure over the preceding weeks | Supporting longer-term assessment | Cannot identify the timing or severity of individual low episodes |
| Urine glucose | Whether glucose entered the urine during the collection period | Additional monitoring in selected cats | A negative result may reflect good control or hypoglycaemia |
No single method replaces the cat’s clinical history, body weight and veterinary examination.
How Do You Perform a Home Blood Glucose Curve?
A blood glucose curve measures glucose repeatedly across one insulin dosing interval.
For many twice-daily insulins, a conventional home curve involves measurements every two hours for approximately ten to twelve hours. The purpose is to identify:
-
The starting glucose
-
The lowest glucose, called the nadir
-
How quickly glucose falls
-
How long the insulin effect lasts
-
How high glucose rises before the next dose
-
Whether an unrecognised low occurs
Current AAHA guidance describes collecting a baseline sample before the normal meal and insulin, followed by readings every two hours for up to ten to twelve hours.
Before beginning the curve
Confirm the plan with your veterinarian.
You should know:
-
Which day to perform it
-
Whether to check glucose before insulin
-
The clinic’s minimum safe pre-insulin threshold
-
Whether to give the full dose if the starting value is lower than expected
-
How frequently to test
-
Which value requires the curve to be stopped
-
Who to contact during the curve
-
What to do if your cat refuses food
Do not improvise these decisions during the curve.
During the curve
Keep the day as normal as possible.
Use:
-
The normal food
-
The normal meal quantity
-
The prescribed insulin
-
The normal injection time
-
The cat’s usual activity and environment
Record any deviation, including treats, vomiting, stress, missed food, a fur shot or unusual exercise.
When should you stop the curve?
Stop routine curve collection and act immediately if:
-
Glucose falls below the emergency threshold provided by your veterinarian
-
Your cat becomes weak, wobbly or disoriented
-
Tremors or seizures occur
-
Your cat repeatedly vomits
-
Your cat refuses food and becomes unwell
-
You suspect an insulin overdose
A curve is an information-gathering exercise. It should never be continued while a cat is becoming clinically unstable.
What Blood Glucose Numbers Are Concerning?
The following values are general reference points from current feline guidance. They are not instructions for changing insulin without veterinary involvement.
| Blood glucose | Approximate mmol/L | General meaning |
|---|---|---|
| Below 60 mg/dL | Below 3.3 mmol/L | Hypoglycaemic range. Treat seriously, particularly if persistent or accompanied by signs |
| 80 to 150 mg/dL | 4.4 to 8.3 mmol/L | Typical ideal nadir range during a conventional blood glucose curve |
| 80 to 300 mg/dL | 4.4 to 16.7 mmol/L | Broad range often used when evaluating an insulin curve |
| Above 300 mg/dL | Above 16.7 mmol/L | Hyperglycaemia, but not automatically an emergency when the cat is bright and eating |
AAHA guidance advises avoiding prolonged glucose below 60 mg/dL and considering insulin reduction whenever clinical hypoglycaemia occurs. Dose changes still need to be directed by the treating veterinarian.
To convert:
-
mg/dL to mmol/L: divide by 18
-
mmol/L to mg/dL: multiply by 18
What Should You Do With a Low Reading?
First, look at your cat.
Signs of hypoglycaemia include:
-
Sudden lethargy
-
Unusual sleepiness
-
Intense hunger
-
Restlessness
-
Strange behaviour
-
Weakness
-
A wobbly or drunken gait
-
Tremors
-
Muscle twitching
-
Collapse
-
Seizures
-
Reduced consciousness
A cat with neurological signs should be treated as hypoglycaemic even if the meter result seems only mildly low or cannot be obtained.
If your cat is alert and able to swallow
-
Offer food immediately.
-
Recheck glucose when possible.
-
Do not give additional insulin.
-
Contact your veterinarian urgently for instructions.
-
Continue monitoring because glucose may fall again while the insulin remains active.
Your veterinarian may recommend a higher-carbohydrate food for the immediate episode.
If your cat is poorly responsive, trembling or unable to eat
Rub approximately one teaspoon of plain corn or glucose syrup onto the gums using a cotton-tipped applicator or syringe.
Do not:
-
Pour syrup down the throat
-
Force food into an obtunded cat
-
Put your fingers into the mouth
-
Delay veterinary care while repeatedly attempting home treatment
If the cat becomes alert enough to swallow, offer food and travel to a veterinarian. There is an aspiration risk when feeding a poorly responsive animal.
If your cat is unconscious or having a seizure
This is an emergency.
Apply syrup carefully to the gums if it can be done safely and leave for the nearest veterinary hospital immediately. Do not place your fingers between the teeth.
Hypoglycaemia can recur after an apparent recovery because the injected insulin may continue working for several hours.
What If a Continuous Monitor Reports a Low Result?
Continuous glucose monitors measure glucose in interstitial fluid rather than directly from capillary blood.
They are useful for following trends, but they are not specifically calibrated for cats. Discrepancies can occur, particularly at low glucose concentrations.
When a CGM reports an unexpected low value:
-
Check your cat for clinical signs
-
Confirm the result with a veterinary-calibrated blood glucose meter when possible
-
Treat immediately rather than delaying confirmation if signs of hypoglycaemia are present
-
Do not increase or reduce insulin solely because of one unexplained sensor value
Current guidance specifically recommends confirming low CGM results with a veterinary-calibrated meter when the cat appears normal before making treatment adjustments.
Does One High Reading Mean the Insulin Dose Is Too Low?
No.
One high result may be caused by:
-
Stress
-
Recent food intake
-
A fur shot
-
A missed dose
-
Incorrect insulin handling
-
A poorly timed spot check
-
A meter or strip problem
-
Insulin that does not last for the full dosing interval
-
Concurrent illness
-
Rebound hyperglycaemia after an earlier low glucose episode
The Somogyi phenomenon describes hypoglycaemia or a rapid glucose fall followed by marked hyperglycaemia caused by counter-regulatory hormones. Increasing insulin because of the later high reading can make the underlying problem worse.
This is why dose decisions need information about:
-
The nadir
-
Insulin duration
-
Clinical signs
-
Body weight
-
Appetite
-
Water intake
-
Urination
-
More than one day of glucose data when possible
A bright, eating cat with one high reading is usually less urgent than a cat with a normal-looking glucose result that is vomiting, dehydrated and refusing food.
Why Can Two Home Glucose Curves Look Different?
Feline insulin responses can vary from day to day even when:
-
The same dose is given
-
The same food is fed
-
Meals occur at the same time
-
Testing is performed at home
Home curves can also be affected by handling stress, activity, food intake and sampling technique. Research has demonstrated meaningful day-to-day variability in glucose curves generated in diabetic cats.
The mistake is treating one curve as an exact permanent map of how the insulin will behave every day.
A glucose curve should be interpreted as one part of a wider pattern.
Are Continuous Glucose Monitors Better Than Ear Pricks?
Continuous glucose monitors, or CGMs, can provide substantially more information than a traditional curve.
A sensor measures interstitial glucose repeatedly throughout the day and night. This can reveal:
-
Overnight hypoglycaemia
-
Rapid glucose changes
-
Differences between daytime and nighttime control
-
The effect of meals and activity
-
Whether low readings recur
-
Whether remission may be developing
-
Day-to-day variability
The FreeStyle Libre system is commonly used in cats and records frequent interstitial glucose values for up to fifteen days in people. Sensors often remain attached for less time in cats, but even two or three days of data can be clinically useful.
Advantages of a CGM
-
Far fewer repeated lancet punctures
-
Day and night monitoring
-
More complete glucose trends
-
Detection of clinically silent lows
-
Data collected during normal home activity
-
Easier monitoring for some difficult-to-handle cats
Limitations of a CGM
-
It measures interstitial glucose rather than capillary blood
-
Low readings may be inaccurate
-
The sensor may detach early
-
Skin irritation can occur
-
The cat may remove or damage it
-
It may not record for the full advertised period
-
Owners may become tempted to react to every small fluctuation
The sensor still needs to be inserted through the skin, usually after a small area of hair is clipped. It is not completely needle-free, but it can avoid repeated daily punctures once attached.
A CGM is an excellent tool, not an automatic insulin-adjustment machine. Cats have enough power over human decision-making already without giving one adhesive disc complete authority over the insulin dose.
Does Every Diabetic Cat Need Daily Blood Glucose Testing?
No.
Some cats benefit from frequent testing during:
-
Initial regulation
-
Dose changes
-
Suspected hypoglycaemia
-
Illness
-
Possible remission
-
A change in diet
-
Introduction or withdrawal of another medication
A stable cat may not need multiple daily capillary tests indefinitely.
Long-term monitoring should also include:
-
Appetite
-
Water consumption
-
Urination
-
Body weight
-
Muscle condition
-
Activity
-
Vomiting or diarrhoea
-
Fructosamine when appropriate
-
Urinalysis
-
Periodic blood testing
-
Assessment for concurrent disease
Once the correct insulin dose has been established, current guidance suggests reassessment after approximately four to six weeks. Stable cats still require full veterinary reviews, commonly every six to twelve months, with earlier assessment when clinical control changes.
What If Your Cat Is Taking an SGLT2 Inhibitor Instead of Insulin?
Home glucose monitoring has a different role in cats receiving an oral SGLT2 inhibitor.
These medications lower glucose by increasing urinary glucose loss. Clinical hypoglycaemia is uncommon, so routine glucose curves or continuous glucose monitoring are often unnecessary.
Ketone monitoring is much more important, particularly during the first two weeks. A cat receiving an SGLT2 inhibitor can develop euglycaemic diabetic ketoacidosis, meaning dangerous ketosis and acidosis may occur even when blood glucose is below 250 mg/dL, or 13.9 mmol/L.
A normal glucose result therefore does not prove that an unwell cat taking an SGLT2 inhibitor is safe.
Contact a veterinarian immediately if the cat develops:
-
Reduced appetite
-
Vomiting
-
Lethargy
-
Weakness
-
Dehydration
-
Unintentional weight loss
-
Positive ketones
Blood beta-hydroxybutyrate monitoring is considered essential for cats receiving this drug class. Follow the exact monitoring schedule supplied by the treating veterinarian.
Can Home Glucose Testing Detect Diabetic Ketoacidosis?
No.
Glucose monitoring may show hyperglycaemia, but diabetic ketoacidosis is diagnosed by combining the cat’s clinical condition with evidence of ketosis and metabolic acidosis.
DKA may cause:
-
Reduced or absent appetite
-
Vomiting
-
Marked lethargy
-
Weakness
-
Dehydration
-
Weight loss
-
Rapid or abnormal breathing
-
Collapse
Concurrent pancreatitis, infection, kidney disease and other illnesses commonly contribute. DKA is life-threatening and requires veterinary treatment with fluids, insulin, electrolyte correction and management of the underlying problem.
Blood or urine ketone testing may be part of your cat’s home plan, but a sick diabetic cat should not remain at home simply because one ketone strip is negative.
How Worried Should You Be?
| Risk level | What you may notice | What to do |
|---|---|---|
| Low risk | Cat is bright, eating normally, maintaining weight and readings follow the expected pattern | Continue the prescribed plan and record results |
| Needs advice | Repeated meter errors, difficulty obtaining blood, one unexpected high reading or a suspected fur shot in an otherwise normal cat | Contact the veterinary team during normal hours |
| Prompt assessment | Ongoing thirst, urination, hunger or weight loss despite treatment, repeated unexpected readings or increasing insulin requirements | Arrange veterinary review within the next few days |
| Same-day care | Reduced appetite, vomiting, marked lethargy, ketones, persistent glucose below the clinic’s safety threshold or suspected overdose | Seek same-day veterinary assessment |
| Emergency | Wobbliness, tremors, severe weakness, collapse, seizures, unconsciousness, breathing difficulty or rapid deterioration | Begin hypoglycaemia first aid when appropriate and go to an emergency hospital immediately |
The glucose number is only one part of the urgency assessment. The cat’s behaviour, neurological function, hydration, appetite and breathing matter more than whether a high reading looks dramatic on the screen.
When Is a Glucose Problem an Emergency?
Seek immediate veterinary care if your diabetic cat has:
-
Collapse
-
Seizures
-
Inability to stand
-
Severe weakness
-
A markedly wobbly gait
-
Tremors
-
Reduced consciousness
-
Suspected insulin overdose
-
Persistent hypoglycaemia
-
Repeated vomiting
-
Complete refusal of food
-
Marked dehydration
-
Rapid or laboured breathing
-
Positive ketones combined with illness
-
Sudden profound lethargy
-
Rapid deterioration over several hours
Do not delay emergency care while trying to produce a perfect glucose curve.
What Should You Do Next?
Before beginning home testing
Ask your veterinary team to provide written instructions covering:
-
Which meter to use
-
Whether results should be recorded in mg/dL or mmol/L
-
The preferred sampling site
-
The appropriate lancet depth
-
When routine tests should be performed
-
The clinic’s low glucose threshold
-
What to do before insulin when the reading is lower than expected
-
When to test ketones
-
What signs require emergency care
-
Who to contact after hours
During the first week of testing
Focus on technique rather than perfection.
Practise:
-
Warming the ear
-
Positioning the meter
-
Supporting the sampling site
-
Obtaining one clean droplet
-
Applying blood correctly
-
Recording every attempt
A failed test is not a medical disaster. An improvised insulin increase based on a questionable result can be.
When sending results to your veterinarian
Include:
-
The complete glucose log
-
Insulin name, dose and timing
-
Meal timing
-
Appetite
-
Water intake
-
Urination
-
Body weight
-
Vomiting or diarrhoea
-
Any missed or uncertain injections
-
Changes in medication
-
Ketone results when applicable
A spreadsheet of numbers without any information about the cat is only half a medical record.
Common Home Testing Mistakes
Using a human meter without discussing its limitations
Human and veterinary meters may report different results from the same sample.
Reacting to one high glucose value
One high reading does not prove that the insulin dose is too low.
Ignoring a low CGM result completely
Sensors can be inaccurate at low concentrations, but the result still needs clinical assessment and appropriate confirmation.
Testing a cold ear
Cold tissue is one of the most common reasons no useful blood droplet appears.
Repeatedly squeezing the sampling site
Excessive manipulation can compromise the sample and increase discomfort.
Using expired or poorly stored strips
Test strips are sensitive to moisture, heat and contamination.
Comparing readings from different meters as though they are identical
Use one recommended device consistently whenever possible.
Increasing insulin without veterinary instructions
This can cause severe hypoglycaemia and rebound hyperglycaemia.
Focusing on glucose while ignoring appetite and weight
A diabetic cat that stops eating or loses weight needs investigation even when the glucose result does not look alarming.
Assuming normal glucose excludes ketoacidosis
This is particularly dangerous in cats receiving an SGLT2 inhibitor.
Turning every test into a wrestling match
If repeated testing is damaging your cat’s welfare or your relationship, discuss a CGM or a different monitoring strategy.
How Can You Prevent Sore Ears and Testing Stress?
You cannot prevent every failed sample or small bruise, but you can reduce problems by:
-
Alternating ears
-
Moving slightly along the ear margin
-
Using a fresh lancet
-
Selecting the correct depth
-
Warming before puncturing
-
Applying pressure afterwards
-
Avoiding inflamed or bruised skin
-
Keeping sessions short
-
Rewarding your cat consistently
-
Stopping after several failed attempts
-
Using a CGM when repeated sampling is not well tolerated
Check sampling sites regularly for:
-
Swelling
-
Persistent bruising
-
Crusting
-
Discharge
-
Pain
-
Skin infection
Allow an irritated site to rest and contact your veterinarian when inflammation persists.
Frequently Asked Questions
What is the best place to test a cat’s blood glucose?
The outer ear margin is usually the easiest and cleanest site. A suitable non-weight-bearing or accessory paw pad can be used when ear sampling is unsuccessful or poorly tolerated.
What blood glucose is too low for a diabetic cat?
A blood glucose below 60 mg/dL, or 3.3 mmol/L, is considered hypoglycaemic and requires prompt action. Treat any cat showing weakness, wobbliness, tremors, unusual behaviour, collapse or seizures as an emergency regardless of the exact reading.
Can I use a human glucose meter for my cat?
Current AAHA guidance recommends a veterinary-calibrated meter because human devices are not calibrated for feline blood and may produce misleading results. Do not switch meter types without discussing the interpretation with your veterinarian.
How often should I perform a glucose curve?
Curves are usually performed when your veterinarian needs to assess insulin nadir and duration, commonly after treatment begins, after a dose change or when clinical control deteriorates. Routine in-hospital curves are no longer recommended for cats, and a CGM may provide more useful information.
Can a FreeStyle Libre replace all ear-prick tests?
Not completely. A CGM can provide far more trend information than a traditional curve, but unexpected low readings may need confirmation with a veterinary-calibrated blood glucose meter, particularly when the cat has no symptoms.
Final Takeaway
Home glucose monitoring can make feline diabetes safer and easier to understand, but the goal is not to produce as many numbers as possible.
Use a veterinary-calibrated meter, collect capillary blood from an appropriate ear or paw site and record each reading alongside food, insulin and clinical signs. Warm the sampling site, use the correct lancet depth and apply gentle pressure afterwards.
Planned glucose assessment is commonly performed five to fourteen days after starting insulin or changing the dose, but there is no rule that prevents earlier testing when hypoglycaemia, illness or an overdose is suspected.
Most importantly, do not change insulin because of one unexpected number. A low reading, a high reading and a normal reading can each mean very different things depending on how your cat is eating, behaving, maintaining weight and responding across the entire dosing interval.
If you are unsure whether your cat’s glucose reading, continuous monitor result, appetite change or insulin response is urgent, ASK A VET™ can help you organise the information and prepare the right questions for your veterinarian.
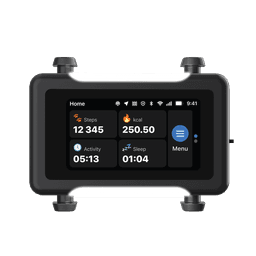
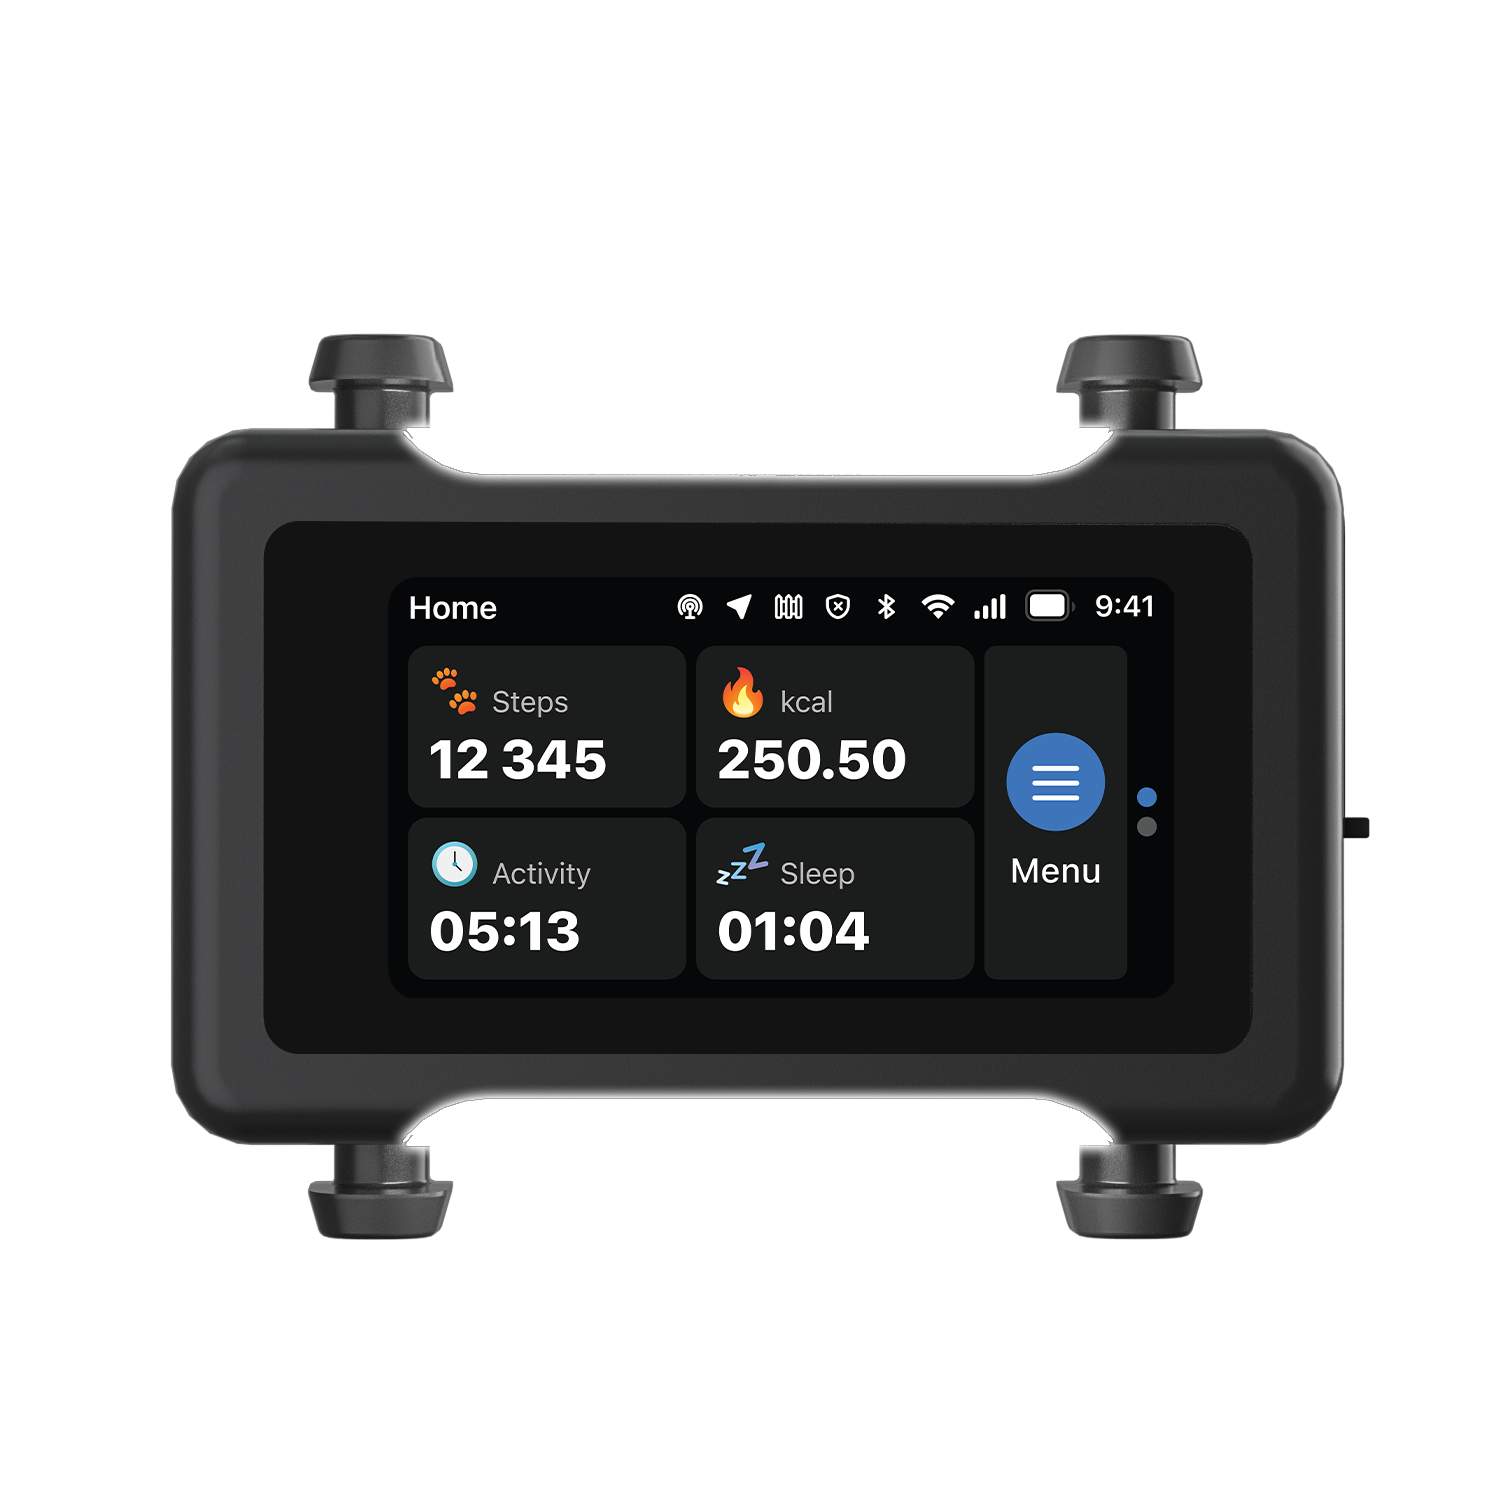
The ASK A VET™ Tracker logs live location and activity trends, so a change in routine never goes unnoticed.
Every ASK A VET article is written and reviewed by qualified veterinarians.