




How to Teach a Dog to Use a Scratchboard for Back Nails
By Dr Duncan Houston
If your dog becomes frightened, restless or defensive when their back paws are handled, a scratchboard may provide another way to maintain some of their nails. Instead of holding the foot and using clippers, you teach your dog to make a controlled downward scraping movement across an abrasive board.
This can make part of nail care more voluntary. However, a scratchboard is not suitable for every dog, may file nails unevenly and will not usually maintain dewclaws. Incorrect positioning or excessive filing can still injure the nails, paw pads, joints or spine.
Quick Answer
Secure a long scratchboard against a low, stable platform on non-slip flooring. First teach your dog to place their front paws comfortably on the platform. Position the angled board beneath their body, then reward small, balanced movements of a hind foot towards it.
Gradually shape one gentle downward scrape. Inspect every nail and both paw pads after only a few effective movements. Never force a paw onto the board or continue if your dog slips, struggles, shows pain or wants to leave.
A hind-foot scratchboard should be treated as one part of nail care, not a complete replacement for nail inspection, clipping, grinding or veterinary treatment.
What Is a Dog Scratchboard?
A dog scratchboard, also called a nail board, is a rigid board covered with an abrasive surface. When the dog scratches against it, small amounts of the outer nail are filed away.
Front-foot filing is generally easier because digging is a natural movement for many dogs. Filing the hind nails requires different positioning and must be taught as a separate behaviour.
The hind-foot method described by CattleDog Publishing uses a raised platform and angled board to shape controlled rear-foot movement without physically holding the paw.
What a Scratchboard Can and Cannot Do
| A scratchboard may help with | A scratchboard may not |
|---|---|
| Shortening some weight-bearing hind nails | File every nail evenly |
| Reducing direct paw handling | Reach the dewclaws |
| Giving the dog more choice | Treat split, infected or ingrown nails |
| Supporting cooperative nail care | Suit dogs with poor balance or painful joints |
| Maintaining nails between professional trims | Completely replace clipping or grinding |
Scratchboards are not automatically stress-free simply because clippers are absent. The dog must still feel safe around the equipment, body position, sound and movement.
Is a Hind-Nail Scratchboard Safe for Your Dog?
| Risk level | Examples | Recommended action |
|---|---|---|
| Lower risk | Healthy nails and pads, normal gait, confident balance | Begin with brief, supervised training |
| Use caution | Senior dog, obesity, mild stiffness, very long nails or previous grooming fear | Discuss suitability with your veterinarian and modify the setup |
| Do not train yet | Lameness, weakness, poor balance, painful joints, damaged pads or split, infected or bleeding nails | Stop and arrange a veterinary assessment |
Dogs with arthritis, hip dysplasia, patellar disease, cruciate injury, spinal disease or neurological weakness may find the front-paws-up position painful or unstable.
Sudden reluctance to use one hind leg should never be dismissed as stubbornness.
Check the Nails and Paws First
Examine every paw in good light before training. Look for:
-
Split, torn or loose nails
-
Bleeding or exposed tissue
-
Nails curling towards or into the pad
-
Swelling or redness around a toe
-
Discolouration, brittleness or abnormal nail growth
-
Cuts, cracks or abrasions on the pads
-
Interdigital redness, discharge or an unpleasant smell
-
Persistent licking or chewing
-
Limping or reluctance to bear weight
The quick is the living tissue inside the nail that contains nerves and blood vessels. Excessive abrasion can expose it, causing pain and bleeding. Long nails may also contain an extended quick and require gradual shortening.
According to Dogs Trust nail-care guidance, every nail should be assessed individually. Dewclaws do not contact the ground normally and can become overgrown, broken or embedded in the skin.
Arrange a veterinary examination before training if your dog has severely overgrown nails, a painful paw, altered movement or a damaged nail.
What You Will Need
Prepare:
-
A wide, rigid scratchboard
-
An abrasive surface that removes nail gradually
-
A broad, stable and suitably low platform
-
Non-slip matting beneath the entire setup
-
Small, appropriate food rewards
-
A clicker or verbal marker such as “yes”
-
A release cue
-
Good lighting for inspecting the nails
-
Veterinary styptic powder for unexpected bleeding
During early training, consider covering the abrasive surface or using a smooth practice board. This allows repeated learning trials without repeatedly filing the nails.
Nail Board Safety Checklist
Before every session, confirm that:
-
The board cannot slide, tip, flex or fall.
-
The platform is stable and weight-rated.
-
The platform is low enough for the dog to step off safely.
-
All edges are smooth and sealed.
-
There are no exposed staples, screws or sharp fasteners.
-
The abrasive covering is flat and firmly attached.
-
There are no splinters, peeling edges or exposed adhesive.
-
The board is wide enough for safe foot placement.
-
The dog can leave freely in any direction.
-
The surrounding floor provides secure traction.
Avoid chairs, stools, tables, counters or furniture that may move when kicked.
There is no universal sandpaper grit suitable for every dog. Nail hardness, scratching force, body weight and board angle all affect how quickly nail is removed. Begin conservatively rather than choosing the harshest abrasive available.
How to Set Up the Scratchboard
The basic arrangement is:
-
The dog’s front feet rest comfortably on a low platform.
-
The scratchboard slopes down from the platform towards the dog’s hind feet.
-
The dog’s hind feet begin on non-slip flooring.
-
The dog’s body remains straight and balanced over the board.
-
The dog can step backwards or sideways to leave.
The position should not require the dog to stand nearly upright, stretch excessively, twist their spine or scramble onto the platform.
Test the board and platform from several directions before bringing your dog into the area. Neither should move or rattle under pressure.
How to Teach Back-Foot Scratchboard Filing
Step 1: Introduce the Equipment
Place the board and platform separately on the floor.
Reward your dog for calmly:
-
Looking at the equipment
-
Approaching it
-
Sniffing it
-
Standing nearby
-
Choosing to interact
Allow your dog to move away whenever they wish. Do not push, pull or place a paw onto the equipment.
If your dog attempts to chew the abrasive material, calmly redirect them and store the board between sessions.
Step 2: Teach Front Paws Up
Remove the scratchboard temporarily and teach the platform behaviour first.
-
Reward your dog for approaching the platform.
-
Mark one front paw touching it.
-
Progress to both front paws on the platform.
-
Reward a brief, balanced stand.
-
Give the release cue.
-
Encourage all four feet back onto the floor.
Deliver rewards at a comfortable head height. Do not lure so far forwards that the dog jumps completely onto the platform or strains to reach the food.
Continue until your dog confidently places both front feet on the platform and waits for release.
Step 3: Add the Secured Board
Position the scratchboard at a gentle angle against the platform.
Ask for the familiar front-paws-up behaviour, but do not ask for hind-foot movement yet. Reward your dog for remaining calm and balanced around the new setup.
Check that:
-
Both front feet are supported.
-
Both hind feet remain securely on the floor.
-
The body is reasonably straight.
-
The dog is not stretching or leaning excessively.
-
The board does not move or rattle.
If the sound or movement worries your dog, secure the equipment more firmly and return to easier equipment introductions.
Step 4: Shape a Small Hind-Foot Movement
Hold a reward at your dog’s nose level and move it only slightly forwards.
As your dog shifts their weight, one hind foot may move closer to the board. Mark and reward that small movement.
Initially, you can reinforce:
-
A slight forward weight shift
-
Lifting one hind foot
-
Moving a foot closer to the board
-
Briefly touching the board
Release and reset your dog after each attempt. This reduces fatigue and gives every repetition a clear beginning and end.
Do not stretch the reward so far forwards that your dog scrambles, climbs or loses balance.
Step 5: Reinforce Board Contact
Once your dog is deliberately moving a hind foot towards the board, wait for the nails to touch the abrasive surface before marking.
Use one marker for the behaviour you are currently teaching. First reinforce deliberate contact. Once that is reliable, raise the criterion to a small downward movement.
Reward calm control rather than speed or force.
Step 6: Capture One Downward Scrape
As your dog adjusts their hind foot, the nails may naturally slide down the angled board.
Mark one small, controlled downward scrape and reward generously. Then release your dog and inspect the foot.
One safe scrape is enough for an early session. You are teaching precision, not starting a canine sanding business.
Step 7: Teach Both Hind Feet
Many dogs naturally favour one foot. Record which foot is contacting the board so the nails do not become uneven.
To encourage the other side:
-
Make very small changes to your position.
-
Shift reward placement slightly.
-
Keep your dog’s spine straight.
-
Reinforce the less-used foot at an easier stage.
-
Practise each foot in separate short sessions if necessary.
Never twist your dog or physically reposition the leg.
Stop and arrange a veterinary assessment if your dog persistently avoids bearing weight on one side, especially if this is new.
Step 8: Add a Cue
Add a verbal cue only when the downward scrape is predictable.
-
Set up the familiar position.
-
Say a cue such as “back scratch”.
-
Give the usual subtle positioning prompt.
-
Mark one controlled scrape.
-
Reward and release.
Use a separate cue if your dog already scratches the board with their front feet.
Step 9: Fade the Food Lure
Once the behaviour is established, keep rewards out of sight.
Give the cue, mark the completed movement and then produce the reward. Continue reinforcing the behaviour regularly.
The goal is to remove the visible lure, not to stop rewarding your dog.
How Much Filing Is Enough?
Inspect every nail and both paw pads after one or two effective scratches.
The amount removed depends on:
-
Board abrasiveness
-
The dog’s weight
-
Scratching pressure
-
Board angle
-
Nail hardness
-
Which toes contact the board
Stop while there is still a safe layer of hard nail covering the quick. Do not wait for pink tissue, sensitivity or bleeding before ending the session.
Dark nails are particularly difficult to assess. If you are uncertain about the safe stopping point, ask your veterinarian, veterinary nurse or qualified groomer to demonstrate what to look for.
Do not continue filing already-short nails while trying to reach a longer neighbouring nail. Use another cooperative-care method for nails that do not contact the board effectively.
How Long Should Sessions Be?
An early session may last only 30 to 60 seconds. One or two controlled movements can be sufficient.
Training frequency should depend on:
-
Current nail length
-
Natural nail wear
-
Board abrasiveness
-
Number of effective scrapes
-
Your dog’s movement and comfort
-
How quickly the nails grow
Avoid a fixed filing schedule. Inspect the nails first and file only when needed.
When no filing is required, you can maintain the behaviour using a covered or non-abrasive practice board.
Signs to Stop Immediately
End the session if your dog:
-
Slips, scrambles or loses balance
-
Repeatedly steps away
-
Freezes or crouches
-
Refuses normally valued food
-
Yelps, flinches or suddenly withdraws
-
Avoids using one hind leg
-
Develops limping or persistent paw licking
-
Becomes frantic or starts kicking forcefully
-
Shows fatigue or escalating stress
-
Develops redness, raw skin or bleeding
Do not punish growling, avoidance or refusal. These behaviours communicate that the exercise has become uncomfortable or frightening.
The American Veterinary Society of Animal Behavior recommends reward-based training and advises against methods involving pain, intimidation or force. Participation should remain voluntary, with a clear opportunity to opt out.
Troubleshooting Common Problems
| Problem | Likely explanation | What to change |
|---|---|---|
| Dog avoids the equipment | It is unfamiliar, unstable or predicts pressure | Increase distance and rebuild positive associations |
| Dog will not keep front paws up | The platform is uncomfortable or the step is incomplete | Lower the platform and reinforce shorter stands |
| Hind feet do not reach the board | The setup does not suit the dog’s proportions | Reassess the platform height and board angle |
| Dog jumps fully onto the platform | The reward is too high or too far forwards | Reward the front-paws-up position sooner |
| Dog touches but does not scrape | The criterion increased too quickly | Reinforce calm contact before waiting for movement |
| Dog scratches frantically | Arousal is too high or too many repetitions are being requested | Reward one controlled movement and release |
| Dog uses only one leg | Habit, alignment or possible discomfort | Adjust positioning slightly and investigate persistent asymmetry |
| Paw pads contact the board | The width, angle or foot placement is unsuitable | Stop immediately and change the setup |
| Nails file unevenly | Individual toes contact differently | Inspect every nail and use another method where needed |
| Dog works only when food is visible | Food has remained a lure | Keep rewards hidden until after the marked response |
| Board noise frightens the dog | The sound has not been conditioned | Secure the board and introduce the sound separately |
Scratchboards tend to be more effective for front nails, and uneven shortening can occur depending on the dog’s movement and board angle, as explained by Fear Free Happy Homes.
What to Do if a Nail Bleeds
Stop the session and keep your dog quiet.
-
Apply firm, continuous pressure using clean gauze.
-
Apply veterinary styptic powder according to its directions if available.
-
Prevent running, licking and further trauma.
-
Inspect the nail without repeatedly disturbing the clot.
Seek prompt veterinary care if:
-
Bleeding is heavy or does not stop after approximately 10 minutes of uninterrupted pressure.
-
The nail is split, loose or partly detached.
-
A large section of the quick is exposed.
-
The toe is swollen or deformed.
-
Your dog is markedly painful or will not bear weight.
-
Bleeding stops and repeatedly restarts.
-
Your dog has a bleeding disorder or takes medication affecting clotting.
Do not pull off a loose nail fragment or give human pain medication. Torn nails can be extremely painful and may require local anaesthesia, sedation and pain relief. Veterinary first-aid guidance for broken nails provides further information.
If a Paw Pad Is Abraded
Stop using the board. Gently rinse superficial debris with clean water or saline and apply pressure if the area is bleeding.
Seek veterinary care for a deep or gaping wound, embedded material, persistent bleeding, marked pain, swelling or discharge. Avoid applying a tight home bandage unless a veterinary professional has shown you how.
Common Scratchboard Mistakes
-
Using an unstable board or platform
-
Starting with a platform that is too high
-
Holding the board where it can slip or trap fingers
-
Using an unnecessarily aggressive abrasive
-
Luring the dog into an excessive stretch
-
Rewarding frantic climbing or kicking
-
Changing angle, duration and repetition count at once
-
Trying to shorten every nail in one session
-
Failing to inspect nails between repetitions
-
Continuing after slipping, fatigue or fear
-
Allowing paw pads to drag across the surface
-
Physically placing a paw on the board
-
Punishing avoidance or growling
-
Assuming all nails are filing evenly
-
Forgetting the dewclaws
-
Using the exercise despite lameness or poor balance
-
Leaving the board available for chewing
Alternatives to a Scratchboard
If the platform exercise is unsuitable, nail care may involve:
-
Gradual cooperative paw-handling training
-
A chin-rest or treatment-station behaviour
-
Desensitisation to nail clippers
-
Desensitisation to a nail grinder
-
Professional grooming assistance
-
Veterinary nail care
-
Veterinarian-guided anxiety medication or sedation when necessary
The goal is safe nail maintenance, not making every dog perform the same trick.
Maintaining the Behaviour and Equipment
-
Inspect every nail and pad regularly.
-
Check dewclaws separately.
-
Clean the board and keep it dry.
-
Replace damaged, contaminated or lifting abrasive.
-
Recheck the platform and board stability.
-
Continue rewarding voluntary participation.
-
Use non-abrasive practice when no filing is needed.
-
Pause training after injury, illness or lameness.
-
Reassess the setup as your dog ages or their mobility changes.
-
Combine the board with other nail-care methods where needed.
Frequently Asked Questions
Can dogs really file their back nails with a scratchboard?
Yes. Dogs can learn a controlled downward hind-foot movement against an angled board. It is a separate behaviour from front-foot scratching and can take longer to shape.
Does a scratchboard completely replace nail clipping?
Usually not. Some nails may miss the board or file unevenly, and dewclaws generally require another method.
Can a dog reach the quick with a scratchboard?
Yes. Repeated abrasion can remove too much nail. Inspect after every few movements and stop early.
What grit should I use?
There is no evidence-based universal grit for every dog. Start with a conservative abrasive that removes nail gradually without contacting the paw pads.
Can dogs with black nails use a scratchboard?
They can, but the quick is harder to assess. Use fewer repetitions and obtain professional guidance if you cannot identify a safe stopping point.
Why does my dog use only one hind foot?
It may reflect habit, positioning or physical discomfort. Adjust the setup gently, but arrange a veterinary examination if one-sided avoidance is persistent or new.
How often should my dog use the board?
There is no fixed schedule. Check the nails regularly and use the board only when filing is needed.
Is a scratchboard suitable for senior dogs?
Only if the dog can hold the required position comfortably and safely. Arthritis, weakness, spinal disease or impaired balance may make the exercise unsuitable.
What if my dog is frightened of the board?
Return to rewarding calm observation and voluntary approaches. Do not force interaction. A qualified reward-based trainer or veterinary behaviour professional can help if fear persists.
Final Thoughts
A hind-foot scratchboard can make part of nail maintenance more cooperative for selected dogs, particularly those who dislike having their paws held. Its success depends on stable equipment, comfortable positioning, controlled movements and frequent inspection.
Build the behaviour one small step at a time. One safe scrape is more valuable than a long, enthusiastic session that removes too much nail.
Most importantly, remember that the scratchboard is only one tool within complete nail care. A dog who needs clipping, veterinary treatment or a different cooperative-care method has not failed.
If your dog has overgrown or painful nails, walks unevenly, struggles with balance or becomes intensely frightened during nail care, ASK A VET™ can help you decide whether home training is appropriate and when veterinary or professional behavioural support is needed.
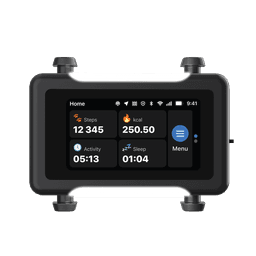
The ASK A VET™ Tracker logs live location and activity trends, so a change in routine never goes unnoticed.
Every ASK A VET article is written and reviewed by qualified veterinarians.